Applicable for version 7.2.1 and 7.2.2
Attendance module contains setup used in other parts of the system. This Attendance module requires the following information to be setup before processing the attendance.
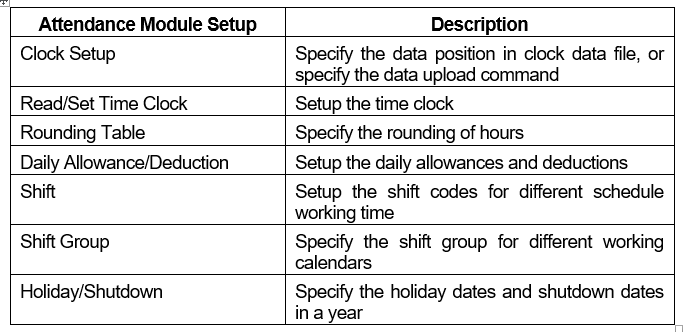
Clock Setup
Clock Setup enables user to setup the command used for downloading clock data directly from the hardware (subject to availability) and the clock data position format in ASCII or text file.
Steps to setup:
1. Drop down the Setup menu and then click on Clock Setup option. The List screen will appear.
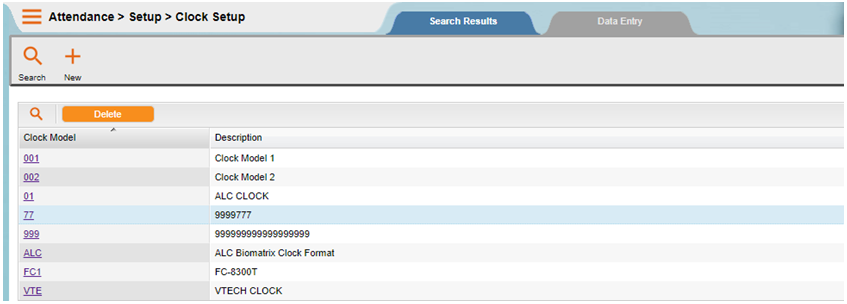
2. Use the List screen to locate the Clock Model Record. Click the ‘OK’ button.
NOTE:
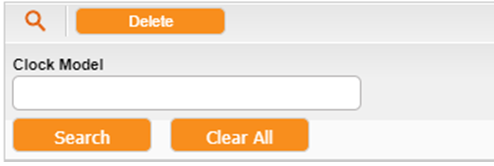
If the entry is not valid, system will indicate a message informing user that there is no record match. Just Click on the ‘SEARCH’ button on the Find dialog and the List screen is displayed. Click to select the clock model.
3. The Clock Setup screen will be shown as the following. Click on the ‘New’ button to add new record.
4. Enter the information accordingly.
General Tab
This screen enables you to define data position for various types of clocks.
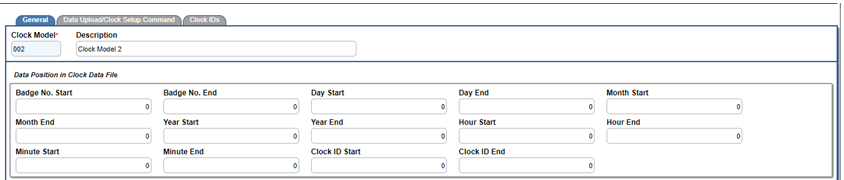
- Clock Model
- This field displays the clock model that your company is using. This field cannot be changed after saved. User can enter up to 3 characters for the clock model.
- Description
- User can enter up to 30 characters for the clock description.
- Data Position in Clock Data File
- Define the text file position where the attendance data will be uploaded during data collection and recovery. The following shows the standard RTA clock text file position setting:-

NOTE:
If the text file position is define wrongly, the clock data will be collected as ‘invalid’. Hence, all employees will become absent.
Data Upload/Clock Setup Command Tab
This screen enables you to define command line to collect & recover clock data, set & read time for clock.
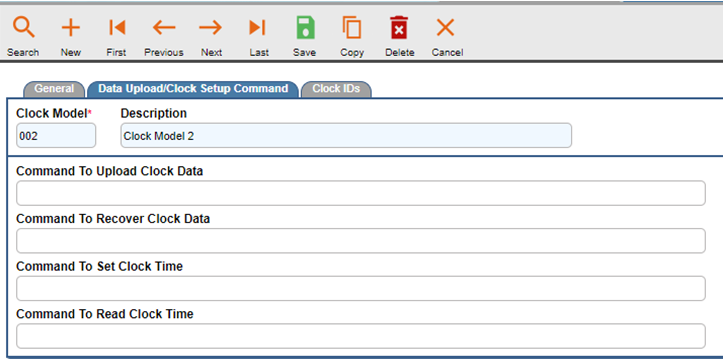
- Data Upload/Clock Setup Command
- Define the command line to collect & recover clock data, set and read date & time for clock. The hardware vendor would be able to provide the command line setting for this setup if the hardware supports this feature. The following shows the example standard command line for RTA Clock:-
| Function | Command Line |
| Command To Upload Clock Data | DATACOMM COLLECT P:1 A:1 F:COLLECT.TXT |
| Command To Recover Clock Data | DATACOME RECOVER P:1 A:1 F:COLLECT.TXT |
| Command To Set Clock Time | DATACOMM SETDT P:1 A:1 |
| Command To Read Clock Time | DATACOMM READDT P:1 A:1 |
Clock IDs Tab
This screen allows you to define the clock IDs of the reader / device.

- Clock ID
- Enter the clock IDs you have.
- For First Clock In Only?
- Tick if want to set for 1st time clock in only.
5. Lastly, click on the ‘Save’ button to save the record entry. The ‘Delete’ button is to delete a selected record.
6. Click on the ‘Close’ button to exit from the screen.
Rounding Table
Rounding table is used to round the computed overtime, late-in, early-out and time-off hours. You can set unlimited rounding tables in the system.
Steps to Setup:
1. Drop down the Setup menu and then click on Rounding Table option. The List screen will appear.
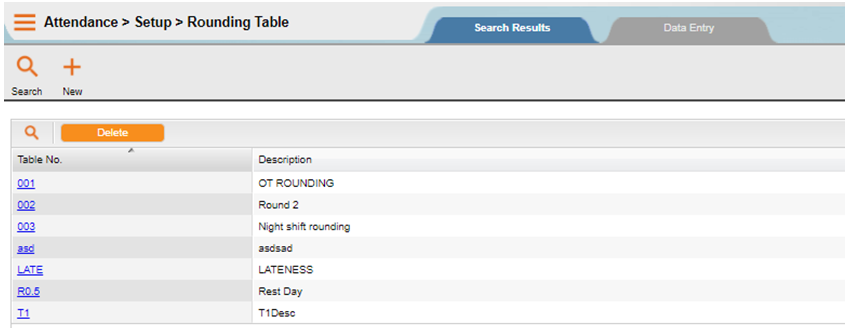
2. Use the List screen to locate the Rounding Table No. Click on the ‘SEARCH’ button.
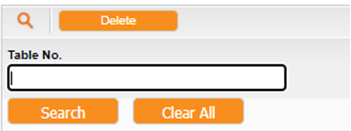
NOTE:
If the entry is not valid, system will indicate a message informing user that there is no record match. Just Click on the ‘SEARCH’ button on the Find dialog and the List screen is displayed. Click to select the Table No.
3. The Rounding Table screen will be shown as the following. Click on the ‘New’ button to add new record.
4. Enter the information accordingly.
Rounding Table Tab
This screen enables you to define different rounding tables setting.
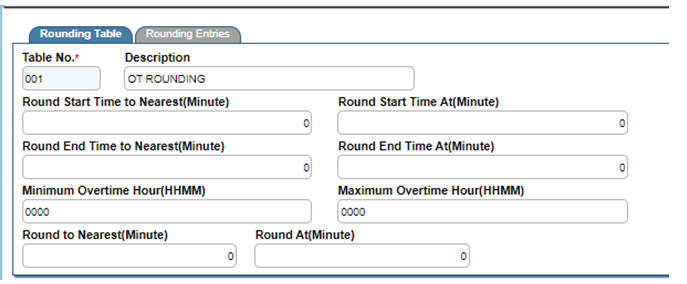
- Table No.
- Specify the rounding table number. User can enter up to 4 characters.
- Description
- Enter the rounding table description.
- Round Start Time to Nearest….Round Start Time At
- Round first clocking time (IN time) to a nearest value.
NOTE:
Example
If you set the round to nearest as 15 minutes and round at 8 minutes, for a rounding value less than 8 minutes will round to 0 minutes. Otherwise, for a rounding value between 8 and 15+8 minutes will round to 15 minutes.
- Round End Time to Nearest….Round End Time At
- Round last clocking time (OUT time) to a nearest value.
NOTE:
Example
If you set the round to nearest as 15 minutes and round at 8 minutes, for a rounding value less than 8 minutes will round to 0 minutes. Otherwise, for a rounding value between 8 and 15 minutes will round to 15 minutes.
- Minimum Overtime HHMM
- This is a global OT entitlement control for the specified shift. Specify the minimum hour and minutes for OT entitlement. If OT performed less than the value defined here, then the employee will not get any OT.
NOTE:
System will always refer to the field setting of Min. Hrs. at Setup > Shift > Overtime schedule before checking on the setting here.
- Maximum Overtime HHMM
- This is a global OT maximum claim control for the specified shift. Specify the maximum hour and minutes that an employee can claim. If OT performed is more than the value defined here, then the employee will get the maximum value defined here only.
NOTE:
System will always refer to the field setting of Max. Hrs. at Setup > Shift > Overtime schedule before checking on the setting here.
- Round to Nearest…. Round At
- For each rounding value, you can specify a nearest value to round to and the minimum value for rounding up.
NOTE:
Example
If you set the round to nearest as 15 minutes and round at 8 minutes, for a rounding value less than 8 minutes will round to 0 minutes. Otherwise, for a rounding value between 8 and 15 minutes will round to 15 minutes.
Rounding Entries Tab
This screen enables you to define minimum and maximum hours in HHMM format to be round to.
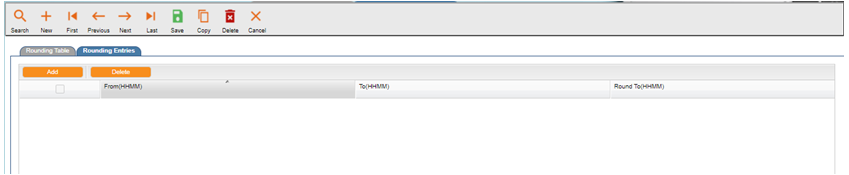
- From(HHMM)
- Specify the minimum hours in HHMM.
- To(HHMM)
- Specify the maximum hours in HHMM.
- Round to(HHMM)
- For a rounding value which satisfies the range of HHMM as previously defined, specify the hours in HHMM to round to.
5. Lastly, click on the ‘Save’ button to save the record entry. The ‘Delete’ button, is to delete a selected record.
6. Click on the ‘Close’ button to exit from the screen.
Daily Allowance/Deduction
Daily Allowance/Deduction enables user to setup allowances/deductions which calculated in daily basis, based on attendance data with its conditions. System will calculate the amount based on criteria that you have set.
Steps to Setup:
1. Drop down the Setup menu and click on Daily Allowance/Deduction option. The List screen will appear.
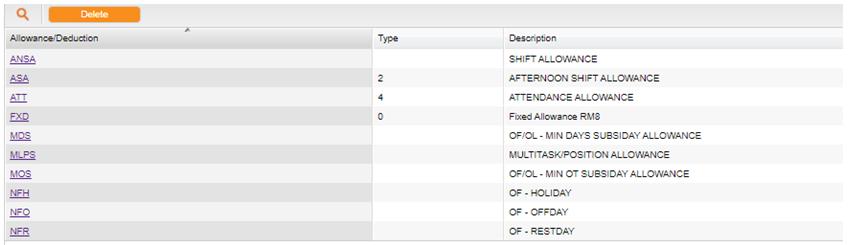
2. Use the List screen to locate the Allowance/Deduction Code or Description. Click on the ‘SEARCH’ button.
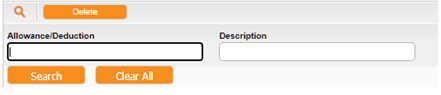
NOTE:
If the entry is not valid, system will indicate a message informing user that there is no record match. Just Click on the ‘SEARCH’ button on the Find dialog and the List screen is displayed. Click to select the daily allowance/deduction.
3. The Daily Allowance/Deduction screen will be shown as the following. Click on the ‘New’ button to add new record.
4. Enter the information accordingly.
General Tab
This screen enables you to define various types of daily allowance/deduction and its conditions.
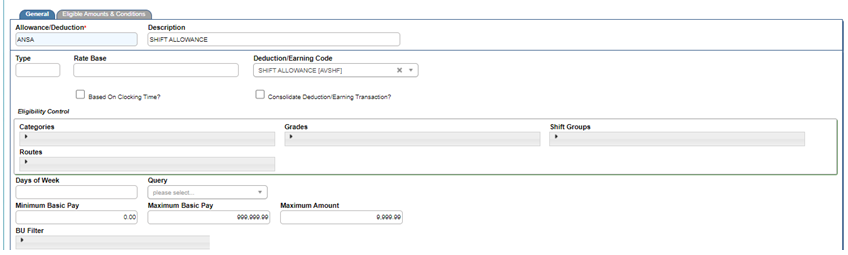
- Allowance/Deduction
- Enter up to 4 characters for the allowance/deduction code.
- Type
- Enter the type of the allowance/deduction. The type defined is for report grouping purposes.
- Rate Base
- Enter the rate base.
- Description
- Enter the description of the code.
- Based on Clock Time?
- Tick the checkbox if the allowance or deduction is computed based on the OT time range that set under Shift > Overtime schedule page.
- Deduction/Earning Code
- Click on the dropdown button to choose a DOE code from the List. The amount of this allowance/deduction will be posted to Payroll module according to the assigned DOE code. If the code is empty, then this allowance/deduction will not be posted to Payroll.
- Consolidate Deduction/Earning Transaction?
- Tick the checkbox if user wishes to consolidate allowance or deduction transactions for transfer to payroll. If the checkbox is ticked, system will sum up the amount and transfer to payroll under one transaction record dated with last day of payroll cutoff date or employee resign date, whichever is earlier.
- Categories
- Click on the dropdown button to select the categories that are eligible the allowance/deduction. Leave as empty if the allowance/deduction applies for all categories.
- Grades
- Select the eligibility of the allowance/deduction based on grades, by clicking on the dropdown button. Leave as empty if it applies for all grades.
- Shift Groups
- Select the eligibility of the allowance/deduction based on shift groups, by clicking on the dropdown button. Leave as empty if it applies for all shift groups.
- Routes
- Select the eligibility of the allowance/deduction based on routes by, clicking on the dropdown button. Leave as empty if it applies for all routes.
- Days of Week
- Enter 1, 2, 3, 4, 5, 6 or 7 to this field if the allowance/deduction is only applicable on certain days of the week. Guideline : 1 for Monday, 2 for Tuesday and so on which is depends on the definition of first day of the week in different server configuration. But some server might start the Monday from 2.
NOTE:
If the allowance is payable from Monday to Friday, then the value for this field is 12345. If the allowance is payable for each day of the week, then leave the field blank.
- Min. Basic Pay….Max.Basic Pay
- Enter the minimum basic pay and maximum basic pay to be entitled for this allowance/deduction. If there is no control on the Basic Pay, set the value from 0.01 to 9,999,999.99.
- Max Amount
- Enter the maximum amount that allows to be paid or deduct within the import period. Enter 99,999.99 for no limit control.
Eligible Amounts & Conditions Tab
This screen enables you to define selected daily allowance/deduction amounts and its conditions.
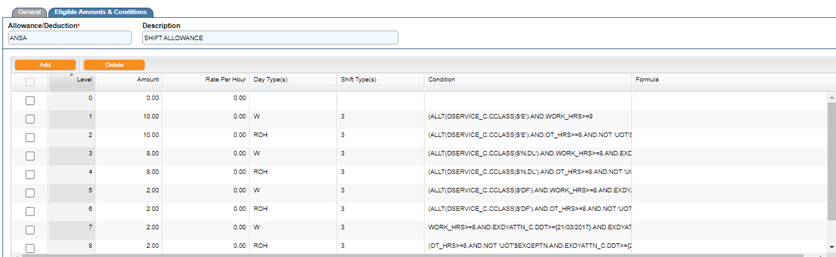
- Level
- Enter the level of priority, normally in a running number. System will base on the sequence defined to check on the conditions matching during the attendance processing.
- Amount
- Enter the daily amount of the allowance/deduction to be paid to the employee.
- Rate Per Hour
- Enter the Rate per hour of the allowance/deduction. This is only applicable for overtime hours provided no formula is defined at ‘Formula’ field.
- Day Type(s)
- Enter the type of the days to be entitled for the allowance.
NOTE:
Example
Enter as RHO if the allowance/deduction is applicable on rest day, holiday or off day only.
NOTE:
W – Working, V – Half Day, R – Rest Day, H – Holiday, O – Off day and etc. You can get this List in Shift > Day Type.
- Shift Type(s)
- Enter the type of shift to be entitled for the allowance.
NOTE:
Example
123 for those shift codes with type 1, 2 or 3.
NOTE:
You can get this List of Shift Types in Shift Codes > Shift Type.
- Condition
- Setup the conditions of the allowance. You may contact your software vendor for assistance. Below are the variables that can be used in condition setup.
| No | Description | Variable |
| 1 | Attendance Date | Attn_dt |
| 2 | Work Hours (normal minutes/60) | Work_hrs |
| 3 | Absent? (.T. or .F.) | Absent |
| 4 | Late in minutes | Late |
| 5 | Early out minutes | Earlyout |
| 6 | Time off minutes | Timeoff |
| 7 | Leave Hours 1 (leave minutes/60) | Lve_hrs1 |
| 8 | Leave Hours 2 (leave minutes/60) | Lve_hrs2 |
| 9 | Leave Code 1 | Lvecode1 |
| 10 | Leave Code 2 | Lvecode2 |
| 11 | Shift Type | Shfttype |
| 12 | Shift Code | Shftcode |
| 13 | Total OT Hours | Ot_hrs |
| 14 | Schedule Hours (schedule minutes/60) | Schd_hrs |
| 15 | Shift Group | Shftgroup |
| 16 | Basic Pay | Basicpay |
| 17 | In Time | In_time |
| 18 | Out time | Out_time |
| 19 | Payroll Group | Paygroup |
| 20 | Job Class | Jobclass |
| 21 | Daily Allowance Rate per Hour | Rate_hr |
| 22 | Exception Code Listing | Exceptn |
- Formula
- Setup the formula of the allowance (if any). You may contact your software vendor for assistance.
5. Lastly, click on the ‘Save’ button to save the record entry. The ‘Delete’ button, is to delete a selected record.
6. Click on the ‘Close’ button to exit from the screen.
Shift
Shift Code is also norm as working schedule. It is used to determine the work start and end time, break time and also the OT schedule in the system. User needs to create shift codes for different day types respectively.
NOTE:
Example
Working day, Rest day, Off day, Holiday, and etc.
Steps to Setup:
1. Drop down the Setup menu and then click on Shift option. The List screen will appear.
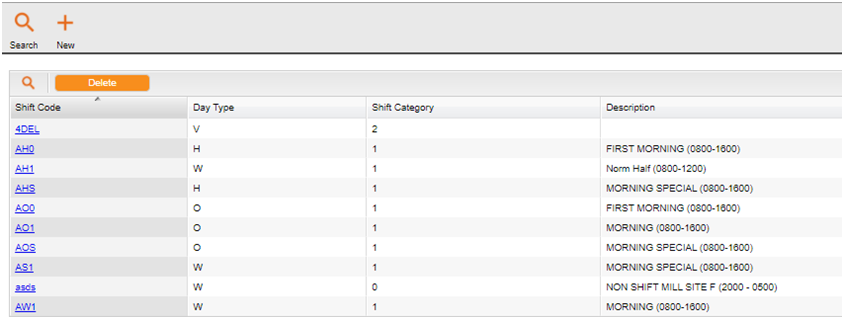
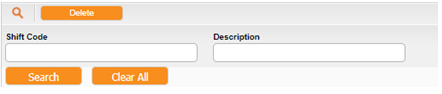
2. Use the List screen to locate the Shift Code or Description. Click on the ‘SEARCH’ button.
NOTE:
If the entry is not valid, system will indicate a message informing user that there is no record match. Just Click on the ‘SEARCH’ button on the Find dialog and the List screen is displayed. Click to select the shift code.
3. The Shift Code screen will be shown as the following. Click on the ‘New’ button to add new record.
4. Enter the information accordingly.
General Tab
This screen enables user to define various types of shift pattern with its schedule in/out time, schedule hours, full shift hours and etc. It also controls the 1st half leave IN time and 2nd half leave OUT time.
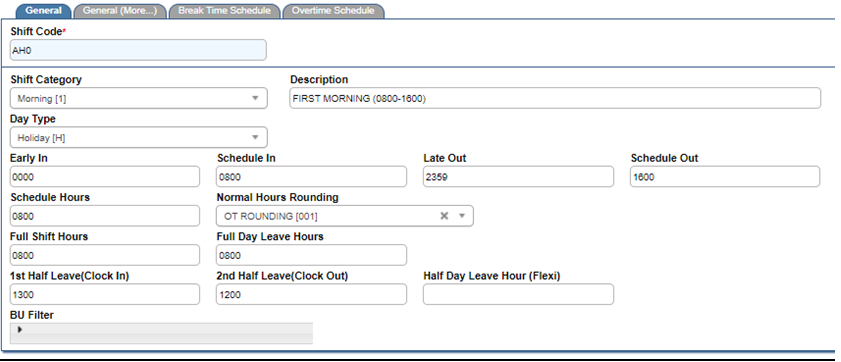
- Shift Code
- Enter any 4 characters code of shift code.
- Shift Category
- Click on the dropdown button to select a category allowed. There are total 10 types of categories in the system which being preset by system. The shift category is summary as below.
| Shift Category | Description |
| 0 | Normal |
| 1 | Morning |
| 2 | Afternoon |
| 3 | Night |
| 4 | Morning (12) |
| 5 | Night (12) |
| 6 | Special No. 1 |
| 7 | Special No. 2 |
| 8 | Special No. 3 |
| 9 | Special No. 4 |
- Description
- Enter the description for the Shift Code.
- Day Type
- Click on the dropdown button to select the day type of the Shift Code, whether is Working, Holiday, Half Day and etc. There are 7 types such as H – Holiday, L – Shutdown, O – Off day, R – Rest day, S – Shutdown, V – Half day and W – Working day.
- Early In
- Enter the earliest In Time for the shift. This is used by the system to determine the clock time sorting sequence during attendance upload & sort. The time format is in HHMM.
NOTE:
If the earliest in time is 0600, those clocking in before 0600 will capture as yesterday’s Out Time.
- Schedule In
- Enter the Schedule In Time for the shift, which refers to the start time of the shift for a day. The Schedule In is in HHMM format.
NOTE:
Those employees that clock in after the Schedule In time will be considered as Late In.
- Late Out
- Enter the latest Out Time for the shift. This is used by the system to determine the clock time sorting sequence during attendance upload & sort. The time format is in HHMM.
NOTE:
If the Late Out time is 0559+ (5:59am next day), those clock out time after 0559+ will capture as tomorrow’s In Time.
- Schedule Out
- Enter the Schedule Out Time for the shift, which refers to the end of shift for a day. The Schedule Out format is in HHMM format.
NOTE:
Employees that clock out before the Schedule Out Time will be considered as Early Out.
- Schedule Hours
- Enter the total Schedule Hours, which refers to the total working hours of a day. The Schedule Hours format is in HHMM format. You may exclude the break time hour if it is not consider as working hour.
- Normal Hours Rounding
- Click on the dropdown button to select the rounding table that had defined under Setup > Rounding Table.
NOTE:
If the rounding table is rounded to the nearest 30 minutes, system will round the actual working hours to the nearest 30 minutes.
- Full Shift Hours
- Enter the Full Shift Hours for the shift, for which the format is in HHMM format. Attendance uses full shift hours to convert work hours or OT hours to days when import from Payroll. Full shift hours normally equal to schedule hours.
NOTE:
OT hours conversion will refer to the OT shift code that defined at Shift > Overtime Schedule tab. If the OT shift code is empty, then no shift day will be imported to Payroll for the OT performed.
You may refer to OT shift explanation at topic ‘Overtime Schedule tab’ for more detail explanation.
- Full Day Leave Hours
- Enter the hours to be shown for the day if an employee is taking full day leave on the working day. The format is in HHMM format.
NOTE:
Example
If the Full Day Leave Hours is configured as 0800 and an employee took half day leave, the system will display the leave hours for the day as 0400.
- 1st Half Leave IN At
- Enter the time that employee should clock in if taking 1st half day leave. The format is in HHMM format.
- System will treat this as schedule in time for the employee. If employee clock in after the time setting here, system will consider it as ‘Late In’.
- 2nd Half Leave Out At
- Enter the time that employee may clock out if taking for 2nd half day leave. The format is in HHMM format.
- System will treat this as schedule out time for the employee. If employee clock out before the time setting here, system will consider it as ‘Early Out’.
General (More…) Tab
This screen enables you to define alternate schedules codes, split overtime hours and shift posting to payroll setting for selected shift code.
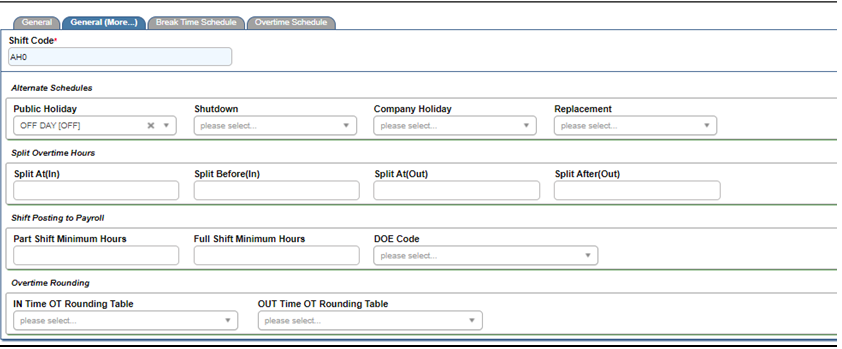
- Public Holiday
- Click on the dropdown button to select a public holiday shift code. System will replace the alternate shift code if the shift code defined in the working schedule falls on public holiday.
- Shutdown
- Click on the dropdown button to select a shutdown shift code. System will replace with the alternate shift code if the shift code defined in the working schedule falls on shutdown.
- Company Holiday
- Click on the dropdown button to select a company holiday shift code. System will replace with the alternate shift code if the shift code defined in the working schedule falls on company holiday.
- Replacement
- Click on the dropdown button to select a replacement shift code. System will replace with the alternate shift code if the shift code defined in the working schedule falls on replacement shutdown.
- Split At (In)….Split Before (In)….Split After (Out)….Split At(Out)
- System will split the overtime hours based on the set time to different days accordingly. This feature is normally used for night shift workers that work until the next day morning. And it applies for the employees that start work on the normal working day, and end their work on public holiday (when the next day is a public holiday).
NOTE:
Example
Employee works overtime from 11pm till 7am the next day, OT hours calculated from 11pm to 12am to be considered as current day OT, while OT hours calculated from 12am to 7am to be considered as next day OT which the OT rate is different.
- Part Shift Minimum Hours
- Enter the minimum hours here to control the partial shift to be posted to Payroll. The value entered must be in format HHMM.
- System will post the shift as defined at DOE code to Payroll. The posting will be success if and only if the normal hour worked or OT hours performed is more than the minimum hours specified here. It will be posted into ‘count’ field in Payroll > Data > Payroll Transaction Entry.
NOTE:
If the field of ‘partial shift as norm/shift’ is ticked at Main > General Setup > Attendance Parameters Tab, then system will calculate the partial shift day as formula below.
Shift Day = normal hours/full shift hours.
- Full Shift Minimum Hours
- Enter the minimum hours here to control the full shift to be posted to Payroll. The value entered must be in format HHMM.
- System will post the full shift as defined at DOE code to Payroll. The posting will be success if and only if the normal hour worked/OT hours performed is more than the minimum hours specified here. It will be posted as 1 into ‘count’ field in Payroll > Data > Payroll Transaction Entry.
NOTE:
If you DO NOT wish to post the shift code and full shift hours to Payroll, you may set the time as 9999.
- DOE Code
- System will post the shift code with the assigned DOE code to Payroll if the condition of part shift minimum hours or full shift minimum hours is fulfilled. Leave it blank if you do not want the shift day to be posted to Payroll.
- IN Time OT Rnd. Table
- Enter the rounding table that had been defined under Setup > Rounding Table. System will round the in time of the day based on the rounding table entered to determine the OT hours.
NOTE:
If the employee clocks in at 0735 and the OT rounded to nearest 15 minutes, system will compute OT as if the employee clocks in at 0730.
- OUT Time OT Rnd. Table
- Enter the rounding table that had been defined under Setup > Rounding Table. System will round the out time of the day based on the rounding table entered to determine the OT hours.
NOTE:
If the employee clocks out at 1935 and the OT rounding is rounded to nearest 15 minutes, system will compute OT as if the employee clocks out at 1930.
Break Time Schedule Tab
This screen enables you to define break time schedules for the selected shift code.
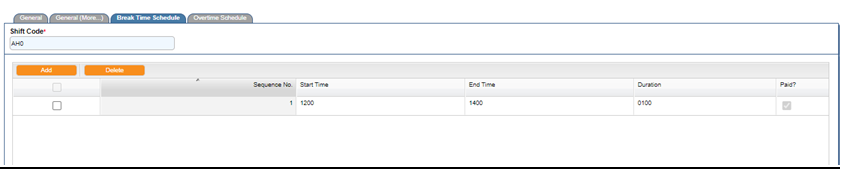
Set up the break time schedule for the shift by filling the parameters below.
- Sequence. No.
- Enter the sequence number in running number.
- Start Time
- Enter the start time of the break schedule in HHMM.
- End Time
- Enter the end time of the break schedule in HHMM.
- Duration
- Enter the duration of the break schedule in HHMM.
NOTE:
To define a flexible break time, you must make sure the duration entered here is less than the actual range from start to end time specified at b & c above.
- Paid?
- If the break time is paid, check on the ‘Paid’ checkbox. But this is only applicable for Time Off during OT worked. If the checkbox is not checked, system will exclude the Time Off hours from the OT hours worked.
Overtime Schedule Tab
This screen enables you to define overtime setting for the selected shift code. You may set up the overtime schedule for OT Before Work (if any) and OT After Work (if any). Leave this screen blank if OT is not given.

Fill the parameters below to create the OT schedule.
- Sequence No.
- Enter the sequence number in running number.
- OT
- Click on the dropdown button to choose the Overtime code for this shift.
NOTE:
If the shift code is for normal working day, you need to choose the OT code which refers to normal day OT rate.
- OT Shift
- Click on the dropdown button to choose the Shift Code for this OT should you need the system to calculate as shift worked during OT hours. This is usually applicable for cases where a shift allowance is also paid for OT worked.
- Start Time
- Enter the Start time for OT hour’s eligibility. The format is in HHMM format.
- End Time
- Enter the End time for OT hour’s eligibility. The format is in HHMM format.
- Min. Hrs.
- Enter the minimum hours for OT to be performed in order to be eligible for OT claim. The format is in HHMM format.
- Max. Hrs.
- Enter the maximum hours entitled for OT claim. The format is in HHMM format.
- Next OT At
- Enter the maximum hours for the specified OT code before the system move the excess hours to another OT code. This is usually applicable for rest day OT and public holiday OT where there are different rates involved on the same day. The format is in HHMM format.
NOTE:
Example
If the Next OT At is set to 0800 and an employee worked 12 hours OT, the excess hours of 4 hours will be considered as next OT rate.
- Rounding Table
- Click on the dropdown button to select the rounding table to round the OT hours.
- OT Allowance
- Click on the dropdown button to select the time based daily allowance code, which the allowance will be paid out base on the Overtime schedule setup.
- Adjust OT
- Adjust the Overtime hours (if any). The format is in HHMM format followed with adjustment type (‘+’ for addition and ‘-’ for deletion).
- Adjust OT When
- Adjust the overtime hours when it reaches a specific number of hours. The format is in HHMM format.
NOTE:
If the employee who works under this shift code is entitled for the OT before work and OT after work, you need to first setup the OT schedule for before work, then continue with OT after work setup.
5. Click on the ‘Save’ button to save the record entry. The ‘Delete’ button, is to delete a selected record.
6. Click on the ‘Close’ button to exit from the screen.
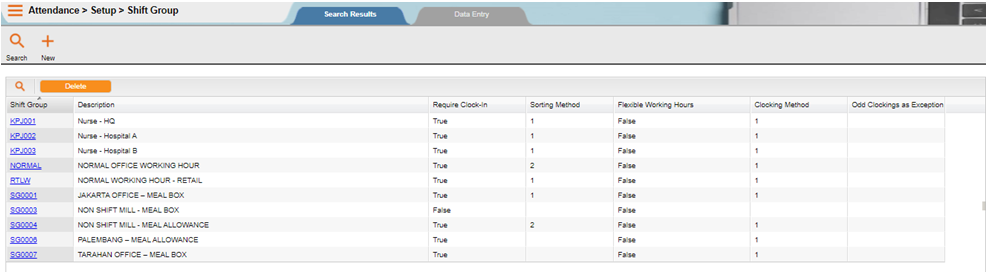
Shift Group
flexHR®HRMS Attendance requires you to group employees into shift group. Each shift group of employees will have common clocking policy, grace periods for late-in, early-out and time off, overtime entitlement, overtime form requirement and unproductive hours offset from OT control.
Steps to Setup:
1. Drop down the Setup menu and then click on Shift Group option. The List screen will appear.
2. Use the List screen to locate the Shift Code or Description. Click on the ‘SEARCH’ button.

NOTE:
If the entry is not valid, system will indicate a message informing user that there is no record match. Just Click on the ‘SEARCH’ button on the Find dialog and the List screen is displayed. Click to select the shift code.
3. The Shift Group screen will be shown as the following. Click on the ‘New’ button to add new record.
4. Enter the information accordingly.
General Tab
This screen enables you to define various types of shift group with its conditions.
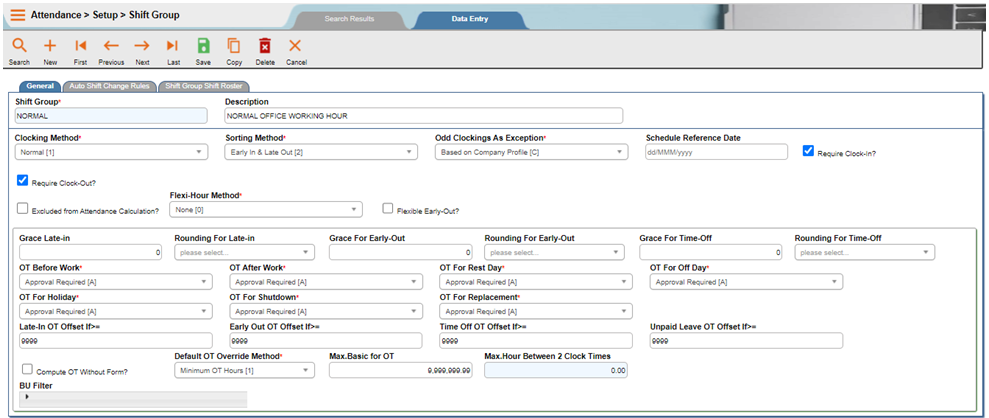
- Shift Group
- Enter any 6 characters for the Shift Group code.
- Description
- Enter shift group’s description.
- Clocking Method
- Click on the dropdown button to select the clocking method for the employees that fall under this shift group.

NOTE:
1. Normal – System will take in all the clocking time for attendance computation
2. Take 1st & Last – System will take First In Time and Last Out Time only and ignore the rest for attendance computation
3. Ignore 1st & Last – System will not take in the First In Time and Last Out Time for attendance computation
- Sorting Method
- Click on the dropdown button to select the sorting method for the shift group.

NOTE:
Auto Shift Change – System will change the shift automatically based on user clock times
Early In & Late Out – System will sort the clock data based on the setting in the Shift Code defined in the group working calendar
- Schedule Reference Date
- This reference date is used for shift group shift roster auto scheduling. The date defined is the start of the 1st day of shift group roster.
- Require Clock in?
- Tick on the checkbox if the employees under this shift group need to clock in for their attendance registration.
- Require Clock Out?
- Tick on the checkbox if the employees under this shift group need to clock out for their attendance registration.
- Flexible Working Hours
- Tick on the checkbox if the employees under this shift group have flexible working hours.
NOTE:
Flexible Working Hours means the employee can clock in anytime, as long as they have completed the scheduled hours.
- Excluded from Attn. Calc?
- Tick on the checkbox if you want the employees under this shift group to be excluded from Attendance Calculation.
- Flexible Early Out?
- Tick on the checkbox if you are allow the employees under this shift group to be going back earlier than the schedule, but without consider it as early out.
- Grace Late-In
- Enter the grace period in terms of minutes.
NOTE:
If the grace period is 5 minutes, employees that clock in 5 minutes or less after the Schedule In Time, system will not consider them as Late In.
- Rounding for Late-In
- Click on the dropdown button to select the rounding table that had defined under Setup > Rounding Table if you wish to round the Late In.
- Grace for Early-Out
- Enter the grace period in terms of minutes.
NOTE:
If the grace period is 5 minutes, employees that clock out 5 minutes or less before the Schedule Out Time, system will not consider them as Early Out.
- Rounding for Early-Out
- Click on the dropdown button to select the rounding table that had defined under
- Setup > Rounding Table if you wish to round the Early Out grace period.
- Grace for Time-Off
- Enter the grace period in terms of minutes.
NOTE:
If the grace period is 5 minutes, employees that exceed 5 minutes or less than the Schedule Break Time duration during working hours, system will not consider them as Time Off.
- Rounding for Time-Off
- Click on the dropdown button to select the rounding table that had defined under Setup > Rounding Table, if you wish to round the Time Off grace.
- OT Before Work/OT After Work/OT for Rest Day/OT for Off day/OT for Holiday/OT for Shutdown/OT for replacement
- Click on the dropdown button to select the option if the employees under this shift group are entitled for the overtime for each of the events available and whether the overtime needs approval or not.

NOTE:
Select ‘A’ if selected overtime for this shift group requires approval.
Select ‘N’ if selected overtime for this shift group does not require any approval. Any OT performed by the employees under this shift group will be auto approved.
Select ‘X’ if this shift group is not eligible for selected overtime.
- Late In OT Offset if >= /Early Out OT Offset if >=/Time Off OT Offset if >= /UPL OT Offset if >=
- Enter minimum hour’s grace of unpaid hours for the system to check before it offset the unpaid hours with OT hours worked.
NOTE:
Example
Offset hours for late in is set as 0030, employees that has late in more than 30 minutes and worked OT in the same day, system will deduct the late in hours from the OT hours worked while the late in hours will be reset as well. The format is in HHMM.
- Compute OT without form?
- Tick on the checkbox, if you want the system to compute the Overtime hours and to be displayed even though there is no OT approval forms entered.
NOTE:
If the checkbox is ticked and the setting ‘Ignore Exceptn if No OT Apprv?’ checkbox in Main > Setup > Company Profile is NOT ticked, the system will show an Exception code ‘UOT’ in the Attendance Screen, indicating that the OT is unauthorized.
- Default OT Override Method
- Click on the dropdown button to choose the OT Override Method.

NOTE:
Minimum OT Hours: System will capture the overtime hours whichever is lower between actual hours worked and approved hours in the overtime form.
Scheduled/Approved Hours: System will capture the scheduled OT hours or approved hours even though the employee has worked more than the scheduled/approved hours or less than the scheduled/approved hours.
Whichever method you have chosen, system employee must work at least 1 minute of OT before the comparison. Otherwise ZERO OT hour will be given even though you choose method 2.
- Maximum Basic for OT
- Enter the maximum basic pay to be entitled for the overtime. Any employees above the maximum basic amount will not be eligible for the OT claim, which system will not compute any OT hours in Attendance Records.
NOTE:
If there is no control on the basic pay, update the value as 999999999.99
- Maximum Hrs. between 2 clock times
- Enter the maximum clocking hours between 2 clock times. This setting will be used by the system to determine the time clock sort between different days.
NOTE:
Example
If maximum hours is set as 14 hours, any clock time that exceed 14 hours from the last clock time will be sorted as the next day clock time. The format is in HHMM.
Auto Shift Change Rules Tab
Auto Shift Change will automatically change the shift code according to the clock time rules that have been set here. The benefit of this Auto Shift Change is user can save the time without changing the shift code individually whenever there is shift change between employees. However, there will have some limitations when dealing overtime before start of shift, especially when the start time of overtime work corresponds to start time of another shift code.
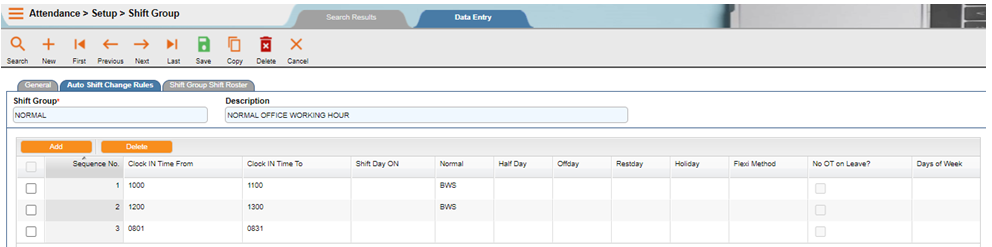
Click on the ‘New’ button to add new record. Enter the information accordingly as below.
- Sequence No.
- Enter the sequence in running number starting from 1.
- From….To
- Enter the range of time for the system to determine the shift code that needs to be changed. This entry will refer to the first clock time of the day.
- For
- Click on the dropdown button to select whether to sort the clock time to previous day (-) or next day (+). Leave empty if the clock time to be sorted into current day.

- Normal
- Click on the dropdown button to change to if the working schedule indicates the day type as working day (W).
- Half Day
- Click on the dropdown button to change to if the working schedule indicates the day type as half day (V).
- Offday
- Click on the dropdown button to change to if the working schedule indicates the day type as off day (O).
- Restday
- Click on the dropdown button to change to if the working schedule indicates the day type as rest day (R).
- Holiday
- Click on the dropdown button to change to if the working schedule indicates the day type as holiday (H).
NOTE:
To setup the Auto Shift Change Rules, user needs to setup based on number of shifts that this shift group works.
Example
For 3 rotating shift, user needs to setup 3 rules which is for Morning shift, Afternoon shift and Night shift.
Refer to the example on screenshot above,
– Those employees who clock in between 0001 to 0200, system will replace the shift code to night shift code and sort the time to previous day
– Those employees who clock in between 0600 to 0800, system will replace the shift code to morning shift code
– Those employees who clock in between 1400 to 1600, system will replace the shift code to afternoon shift code
– Those employees who clock in between 1900 to 2400, system will replace the shift code to night shift code
If the clocking time is falls outside the time range specified, system will refers back to employee individual schedule or else group schedule.
Shift Group Shift Roster Tab
Shift Roster is the place where you can define the working calendar for each shift group.
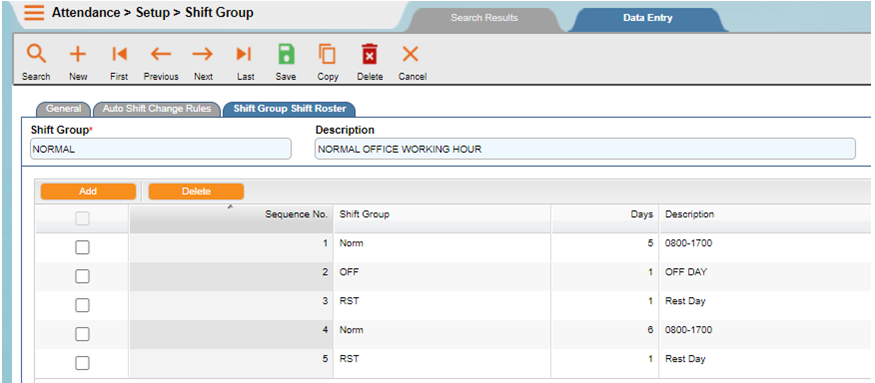
Click on the ‘New’ button to add new record. Enter the information accordingly as below.
- Seq. No.
- Enter the sequence in running number which starting from 1.
- Shift
- Click on the dropdown button to select the shift code.
- Days
- Enter number of days for that shift code in this roster.
NOTE:
To define shift group shift roster under Attendance > Setup > Shift group, you are required to enter the schedule reference date. System will refer to this reference date as a start date to count the number of days defined in roster schedule. The shift roster patterns should be in repeating sequence.
Referring to the screenshot above, if schedule reference date is 01/01/2006, system determines that SOFF will be scheduled from 01/01/2006 to 05/01/2006 (5 days), SOOF on 06/01/2006 (1 day) and SOFR on 07/01/2006 (1 day). System will repeat the schedule according pattern of 5 days of SOFF, 1 day of SOOF and 1 day of SOFR throughout the years.
5. Click on the ‘Save’ button to save the record entry. The ‘Delete’ button, is to delete a selected record.
6. Click on the ‘Close’ button to exit from the screen.
Create Bus Shift
Bus shift is used for transport planning purposes. This is linked to Transport Module.
Steps to setup:
1. Drop down the Setup menu and click on Bus Shift option. The List screen will appear.
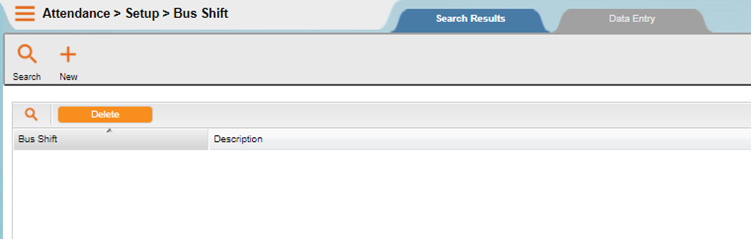
2. Use the List screen to locate the Bus Shift or Description or shift type. Click on the ‘SEARCH’ button.

NOTE:
If the entry is not valid, system will indicate a message informing user that there is no record match. Just Click on the ‘SEARCH’ button on the Find dialog and the List screen is displayed. Click to select the bus shift code.
3. The Bus Shift screen will be shown as the following. Click on the ‘New’ button to add new record.
4. Enter the information accordingly.
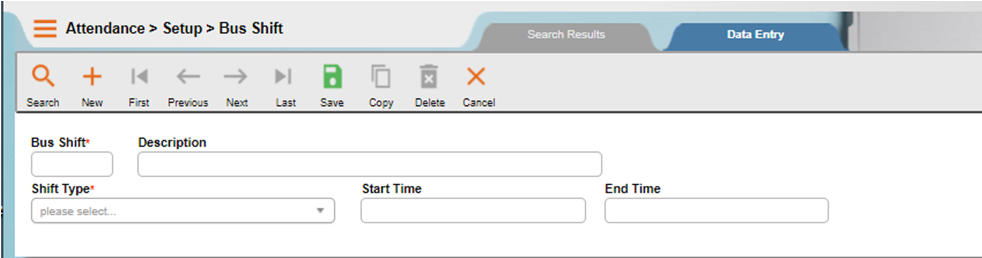
- Bus Shift
- Enter any 4 characters for the Bus Shift code.
- Description
- Enter bus shift’s description.
- Shift Type
- Click on the dropdown button to select shift type from the List.

- Start Time
- Enter the bus shift start time in HHMM format.
- End Time
- Enter the bus shift end time in HHMM format.
5. Click on the ‘Save’ button to save the record entry. The ‘Delete’ button, is to delete a selected record.
6. Click on the ‘Close’ button to exit from the screen.
Setup Holiday/Shutdown
flexHR®HRMS Attendance supports two types of holidays which are Public holiday and Company holiday. The same setup screen is used to define for shutdown as well. For each holiday and shutdown defined, you can specify a list of employees excluded or shift group to be excluded from the holiday.
Steps to Setup:
1. Drop down the Setup menu and then click on Holiday/Shutdown option. The List screen will appear.
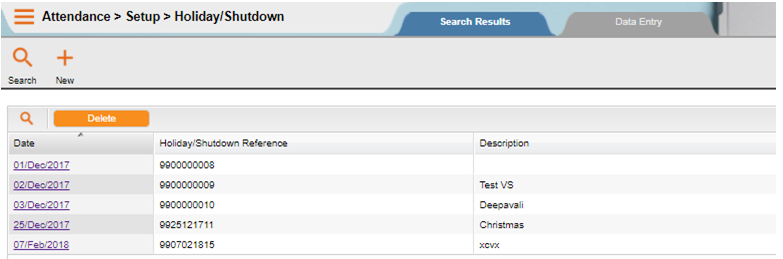
2. Use the List screen to locate the Holiday/Shutdown reference or Date (Min) or Date (Max) or Day type. Click on the ‘SEARCH’ button.

NOTE:
If the entry is not valid, system will indicate a message informing user that there is no record match. Just Click on the ‘SEARCH’ button on the Find dialog and the List screen is displayed. Click to select the holiday.
3. The Holiday/Shutdown screen will be shown as the following. Click on the ‘New’ button to add new record.
4. Enter the information accordingly.
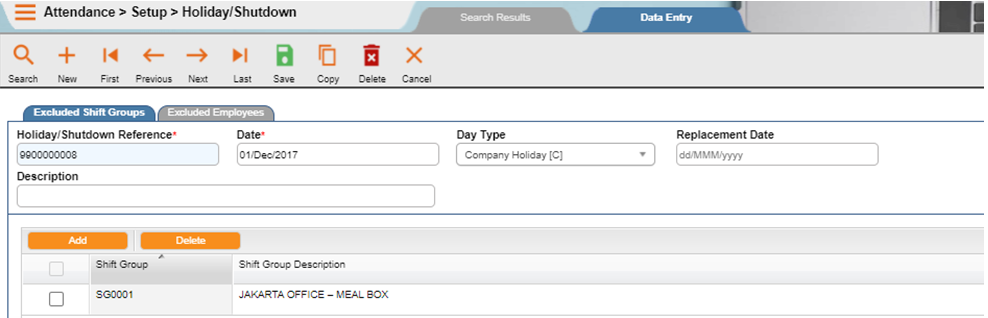
- Holiday/Shutdown Reference
- This reference number is auto generated by the system.
- Date
- Enter the date on which the holiday/shutdown falls on in DD/MM/YYYY format.
- Day Type
- Choose the holiday type as public holiday or company holiday or shutdown. You may click on the dropdown button to select.
- Replacement Date
- Enter the date which is the replacement for the shutdown day. The replacement date can be before or after the shutdown day.
- Description
- Enter the holiday/shutdown description.
Excluded Shift Groups Tab
If any shift group is excluded from the defined holiday/shutdown, enter the shift group code. You have to click on the ‘Add’ button to add the shift group code.
Leave blank if all the shift groups are eligible for the holiday/shutdown.
Excluded Employees Tab
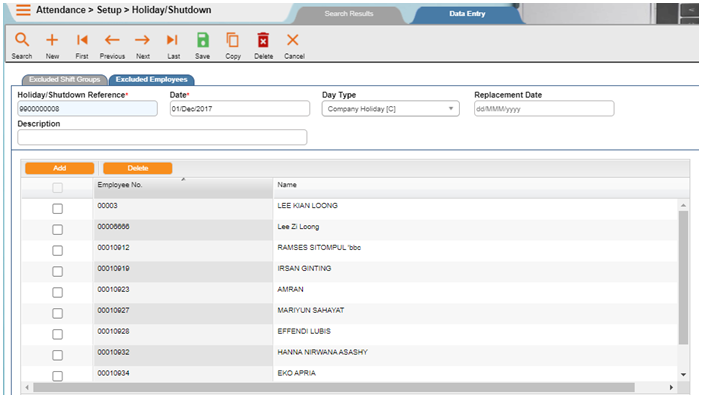
If any employee is excluded from the defined holiday, enter the employee No. of the excluded employees. You have to click on the ‘New’ button to add the employee No. Leave blank if all employees are eligible for the holiday/shutdown.
1. Click on the ‘Save’ button to save the record entry. The ‘Delete’ button, is to delete a selected record.
2. Click on the ‘Close’ button to exit from the screen.
