Add a New Form

After clicking “Forms” in the left menu column, in the page that displays (see above), click “Add new“.
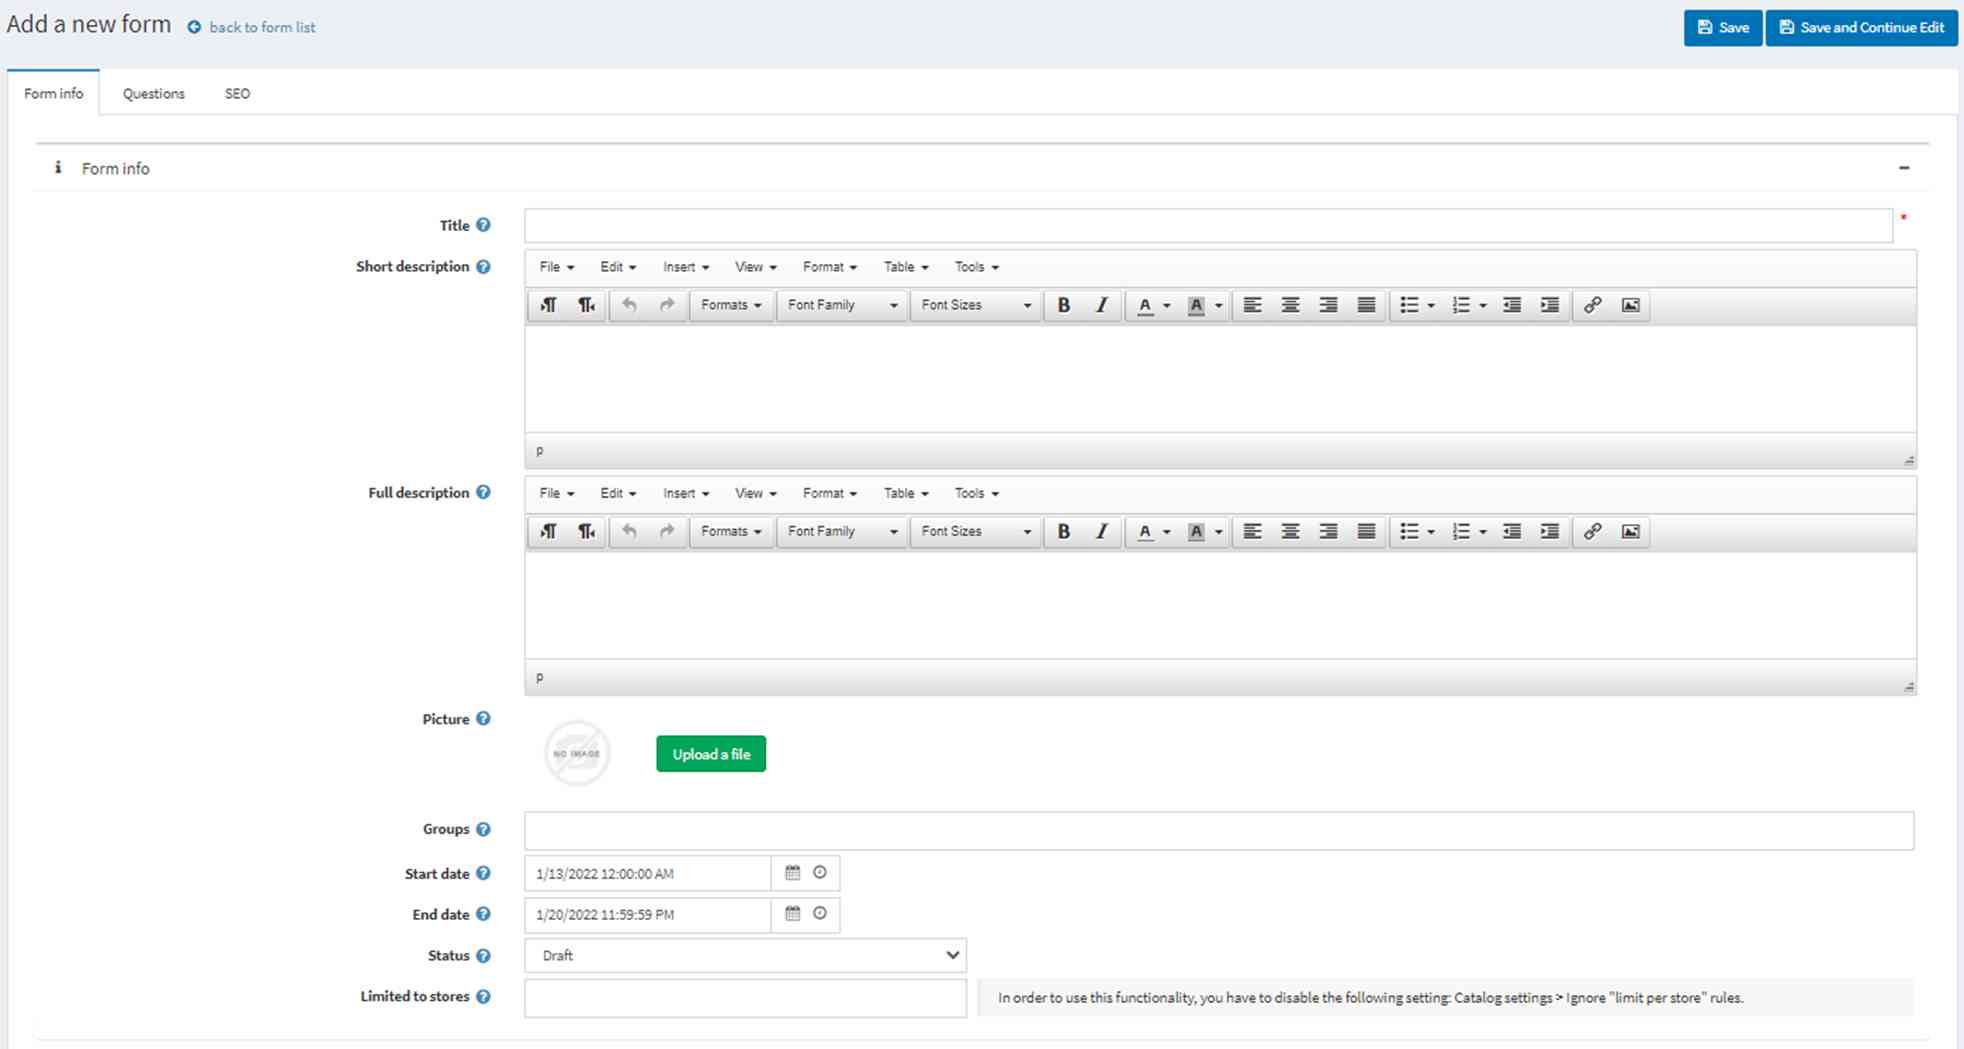
Define the following information:
- Title which will be displayed on the dashboard and summary page.
- Short description which is displayed in the summary page.
- Full description is the form’s background information that is displayed when user clicks to view the contents in the form.
- We strongly recommend that you upload a thumbnail picture for the form. This is displayed in the summary page.
- Groups is to assign this form under one or more Groups.
- Start and End date of the form to be displayed. Take note that status has to be “Active” for the form to be effective.
- Status of the form. This can be:
- “Draft” which is only visible for administrator’s preview and not user’s,
- “Active” where article appears between the start/end date, or
- “Inactive” which does not display the form.
- Limited to stores is an optional setting to restrict the form to a selected store, when there is more than one store.
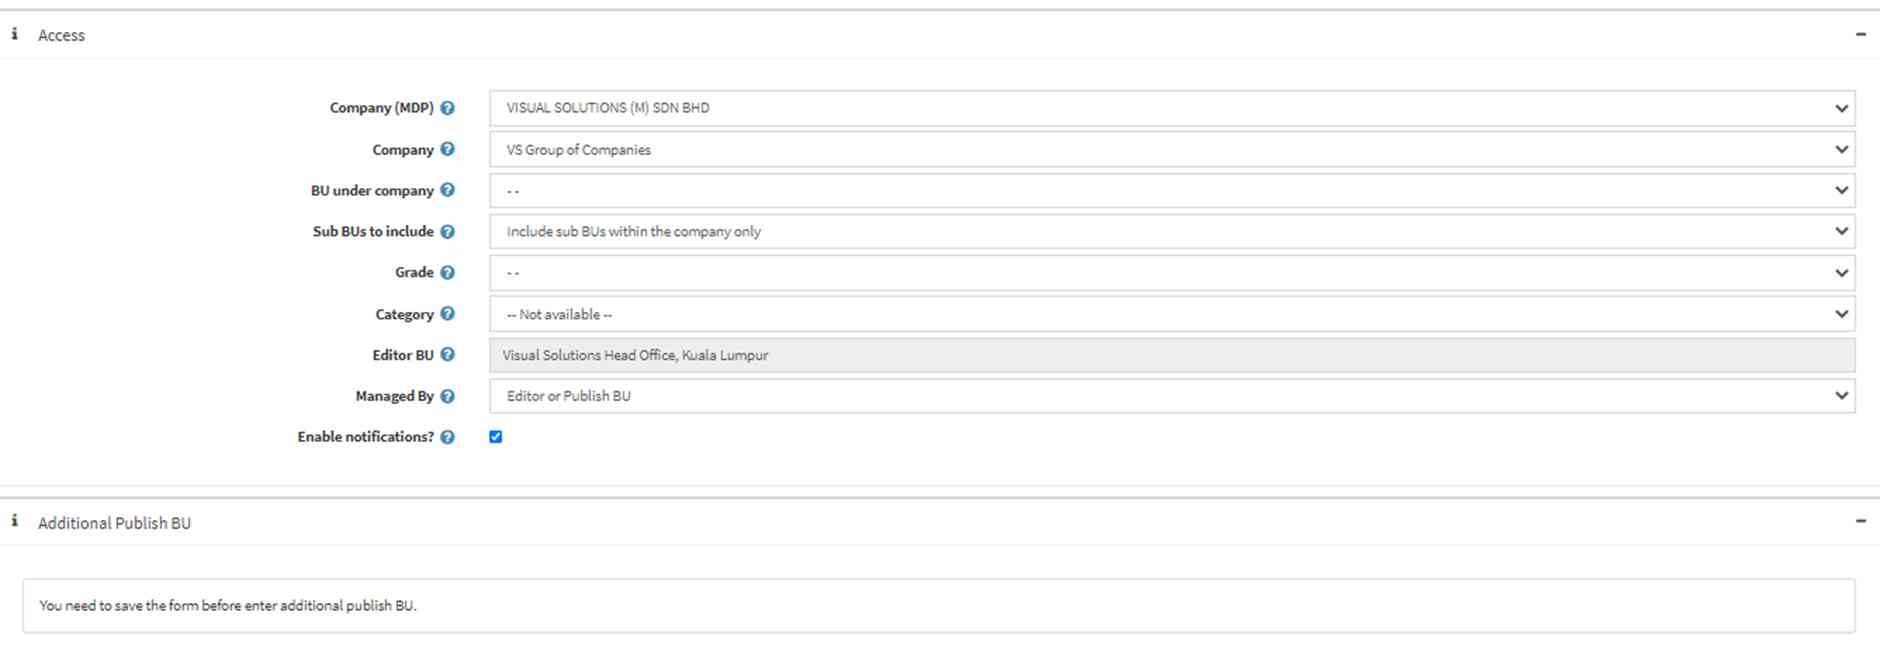
- Company is to assign the Company whose users can view this form, when there is more than one company.
- BU under company is to assign the business units (BU) within the Company whose users can view this form. This provides more detailed user targeting for the form.
- Sub BUs to include is a flag to further target users for this form. This can be:
- “Include Sub BUs within the company only” is to exclude all sub BUs that do not belong to this company,
- “Include Sub BUs in all levels below” is to include all sub BUs within this company’s hierarchy, plus all sub BUs of other companies that are in the same hierarchy,
- “None” is to exclude all sub BUs of this company.
- Grade is to target the form to users based on grade, for example job grade.
- Category is to target the form to users based on category, for example category of users.
- Editor BU is for information only and shows the business unit (BU) that created the form.
- In Managed by, the form can be managed by 1) Editor or Publish BU, 2) Editor BU only or 3) Publish BU only. We suggest to use the default, which is option 1.
- Enable notifications? is a flag to enable notifications for this form.
- Additional Publish BU is to assign additional Companies, BUs, Sub BUs, Grade and Category, to this form.
Save the form first before adding Questions. Click “Save and Continue Edit” to remain within the form. Then proceed to the Questions tab.
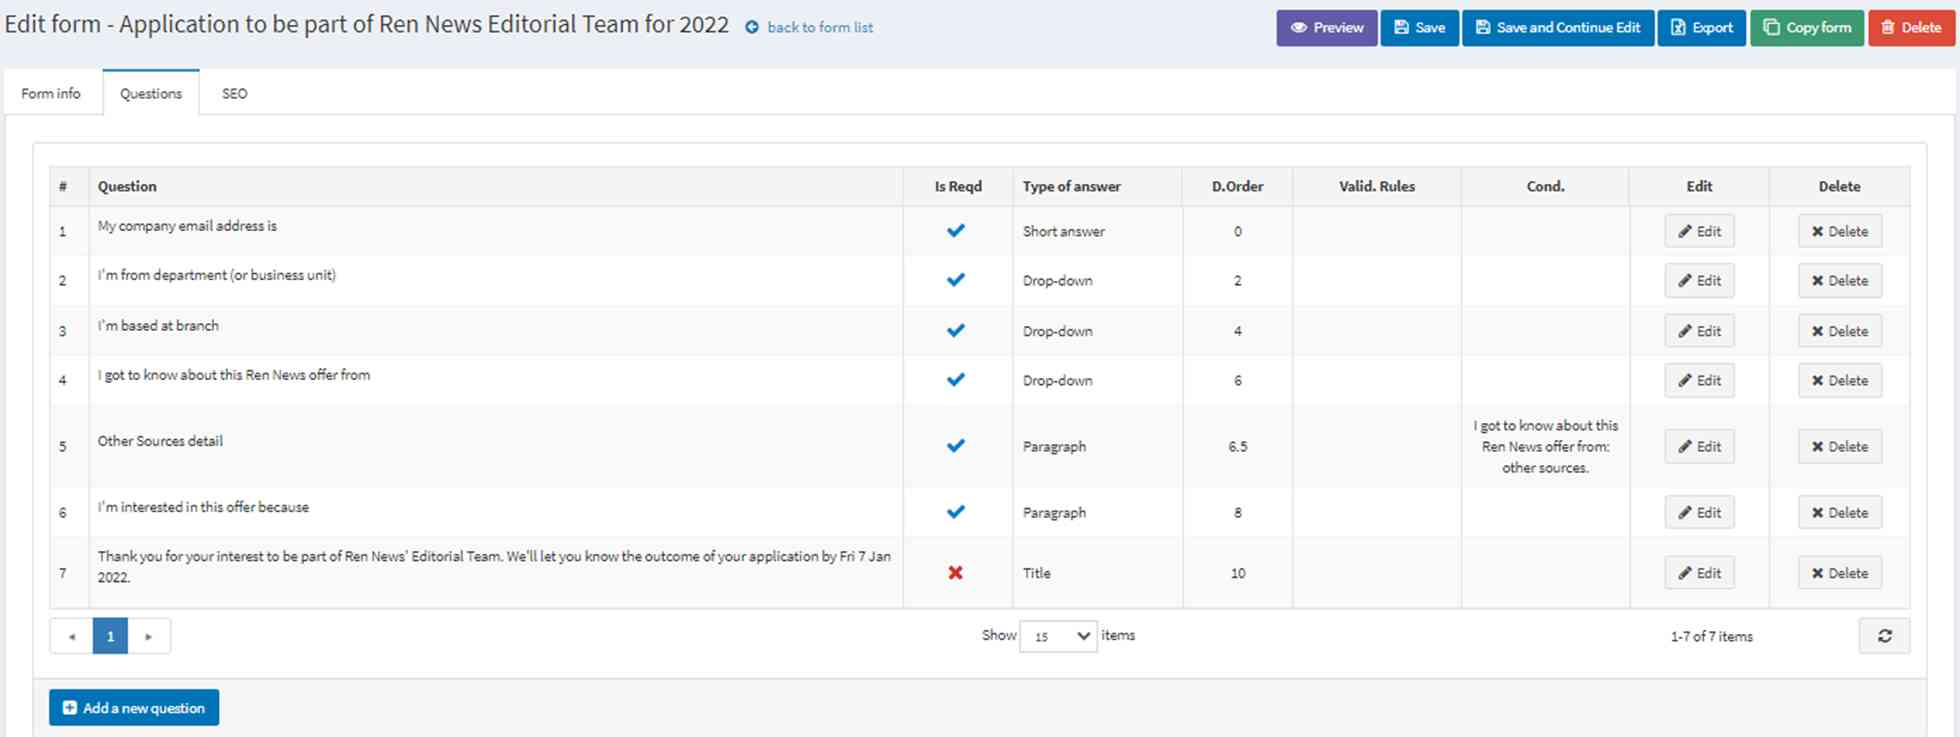
Click “Add a new question” and define the following information:
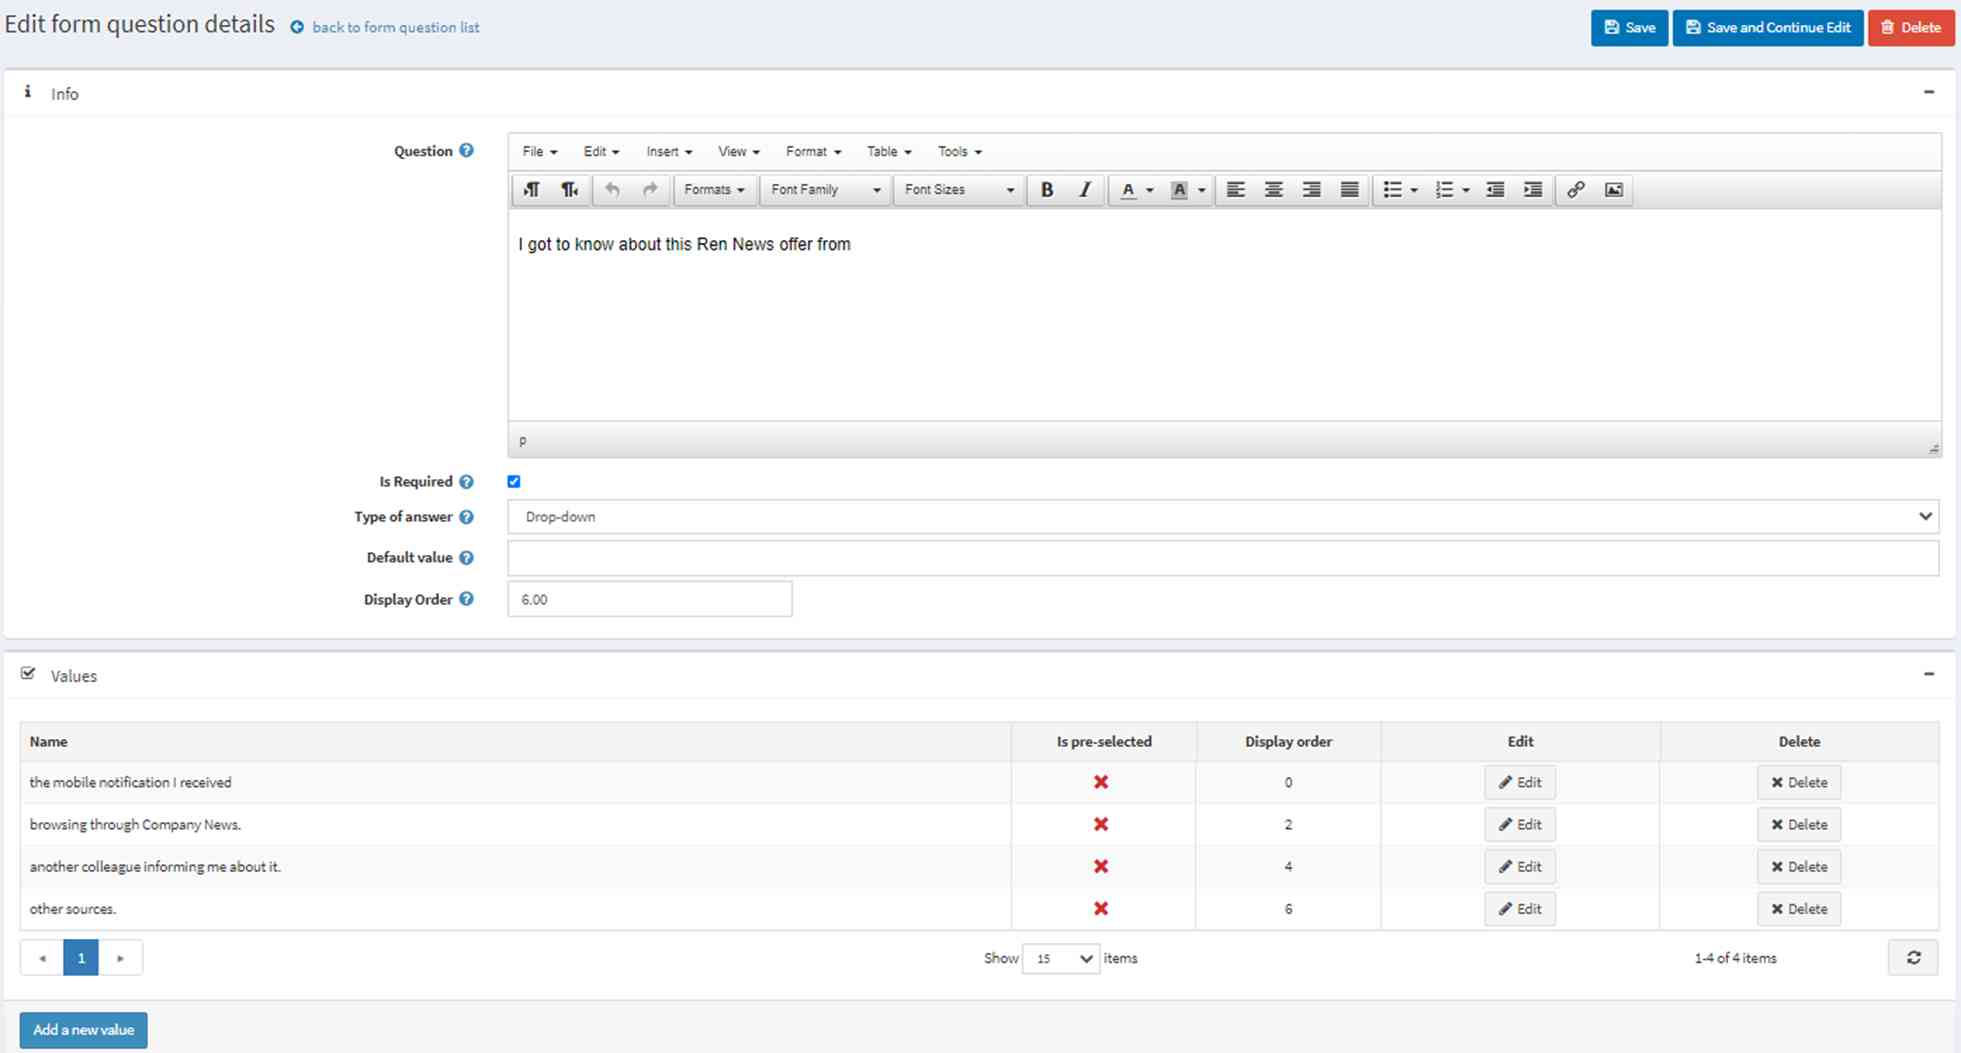

- Question which is the question displayed in the form.
- Is required is to flag mandatory question(s) in the form, which users must respond to.
- Type of answer are the format options for answering this question. This can be:
- “Drop down” display a drop down list of answer values where any one value only is selectable,
- “Multiple choice” display a range of answer values where any one value only is selectable,
- “Checkboxes” display a range of answer values where more than one value is selectable,
- “Short answer” display a text box with a defined “Minimum length” and “Maximum length” for a short answer
- “Paragraph” display a text box with a defined “Minimum length” and “Maximum length” for a long answer
- “Date” display a pop-up date selector for the date answer
- “File upload” display a pop-up file selector with a defined “Allowed file extension” and “Max file size (<10240 KB)“
- “Color squares” display a range of color choices where any one value only, is selectable. For example, select a color for a gift T-shirt.
- “Image squares” display a range of image choices where any one value only, is selectable. For example, select a gift mouse design.
- “Read only checkboxes” display a range of user defined checkboxed read only text content.
- “Title” display a read only user defined text content.
- Default value is to display a default answer value for the question.
- Input the Display order of the Questions with the lowest number on top.
- Values is for keying the range of answer values for the Question. Click on the “Values” title and then “Add a new value” to start the input screen.
- Name is the displayed description for the answer value.
- Is Pre-selected is to flag an answer value to display as pre-selected.
- Input the Display order of the answers with the lowest number on top.
- Condition is to set this Question as hidden. This Question is displayed only when another Question, defined below, is responded to at a pre-defined answer.
- Enable condition is to enable a condition to apply to this Question.
- Question is to select a prior Question and its pre-defined answer, that triggers the display of this Question.
Refer to screenshot titled “Edit form – Application to be part of Ren News Editorial Team for 2022”. Question 5 is conditional upon question 4. Question 5 is hidden and the user can respond to it only after question 4 has been responded to with the pre-defined answer.
Link a Form from a news article
When a cover page is needed to go with a form, it is done by linking the form to an article. The below screenshot is from the bottom section of the “Add new article” page.

- Link to? is to flag what this article is to be linked to. Select “Form” to link to a form.
- Link label is the text to display inside the article for a clickable link.
- Show which forms? is to define what list of forms is available for selection in the below drop down.
- Form is the drop down list of forms for selection and linking
In the published article, the link appears at the bottom of the article’s page as shown below.
